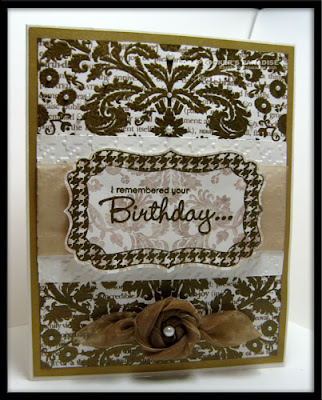
Hi all, well it's time for another Feature Product Post and this time it's the
Stampendous Embossing Powder Kits!!! Love them, they give you a great way to try a bunch of colours and a little goes along way!!! So who's up for winning some awesome powders..........see the deets at the end of my post!!! So onto today's post, this time I decided to make 2 cards and I hope you like them.......l know I enjoyed playing with these powders!!! So here's the first card............
Products Used:
Cardstock: Black, Core'dinations All in the Family- Violets
So a little bit of how I put it all together.....I die cut the card and the sticky backed canvas with the spellbinders dies, then I peeled the backing off of the canvas and used the sticky back to apply the EP's, one at a time heating them as I did each colour. I really love the effect of this, it looks awesome!!! Then I stamped it with the Music Background. Now I die cut the black cardstock for the flourishes and used the Versamark ink on them and then the EP's. Then I stamped the sentiment, embossed it and punched it out using the Photo Labels punch. Then I just added some of the rhinestones to the flourishes, you know I love my bling!!!!
Now, onto the second card............I really wasn't too sure about this card, but I figured I would share it anyways.........so here it is.......let me know what you think........
Products Used:
Cardstock: White, Core'dinations all in the Family- Violets & Pretty in Pink
Well, are you still with me???.........lol....so the info on how I did this card.
First, I die cut the flowers then I used my Stamp-a-ma-jig to line up the stamping. I love the MFT dies and stamps, they're awesome!!! If you're not sure on how to use a Stamp-a-ma-jig see
this post.....it definitely comes in handy and is so quick and easy to use!!! Then I coloured in the flowers with my versamark marker and embossed, doing only one colour at a time, that way they don't mix together. Once the flowers were done, I added the flower soft to the center. Then, I used my embossing folder and I sanded the cardstock. Die cut the lacy circle twice and cut them in half. On the bottom one, I used the EP 3x and then stamped into it with my sentiment, while it was still hot..........it showed up really well in person, but not so much for the camera........lol....so I used my Stamp-a-ma-jig again and used the Staz On white, now it shows up better for the camera, and I actually like how it looks. Did a little bit of sanding on them added my ribbon and tied a bow.
That's pretty much it for this card..........okay now on to the good stuff..........would you like to
WIN one of the Stampendous EP Kits???? All you have to do is head back to the
Scrapbooker's Paradise Blog and leave a comment on the Stampendous EP featured product post.........how easy is that!!!
Now, check
Sara's post to see what she's done with her Embossing Powders!!!
**The shipping charge in cart will be removed when the order is processed. Order total calculated before GST. Offer valid only within the ten Canadian provinces. Orders destined for Labrador, Nunavut, Yukon, NWT, United States and abroad will be charged the actual shipping amount.
Also,
Stampendous Embossing Powder Kits are only $10.75 between January 16th - 31st, 2011 use Code:FIEK in the comments section!!!
Till next time....................


